Configure LS-AAI in Keycloak
Configure identity providers (IdPs) in Keycloak to enable federated authentication through LS-AAI and Azure AD. This guide covers OpenID Connect setup, attribute mapping, and token configuration.
Prerequisites
- Keycloak instance deployed and accessible
- Admin access to Keycloak
- LS-AAI service registration completed (see LS-AAI service providers)
- Azure AD app registration configured (if using Azure AD)
Identity provider configuration requirements
When configuring identity providers, you will need the following information for OpenID setup:
- ClientSecret: Provided by the IdP during registration
- ClientId: Unique identifier for your application
- Token URL: OAuth2 token endpoint
- Authorisation URL: OAuth2 authorisation endpoint
- Redirect URI: Keycloak callback URL
The Token URL and Authorisation URL are derived from the IdP. When registering a service, you acquire the ClientId and ClientSecret. The Redirect URI, which remains constant, is provided by Keycloak:
https://{app_name_azure}.azurewebsites.net/auth/realms/master/broker/azuread/endpoint
Configure Azure AD integration
Configure Azure Active Directory as an identity provider in Keycloak.
Register application in Azure AD
Manage app registration in the Azure portal at portal.azure.com.
For detailed Azure integration steps, refer to the tutorial at https://www.youtube.com/watch?v=LYF-NLHD2uQ, which explains both service registration and Azure AD setup within Keycloak.
Configure Azure AD in Keycloak
Set up Azure AD as an identity provider with the following configuration:
- Scopes:
openid,profile,email,elixir_id - Method: POST the ClientSecret
- Sync method: Import
Configure LS-AAI integration
Configure LS-AAI (Life Science Authentication and Authorisation Infrastructure) as an identity provider in Keycloak.
Register Keycloak with LS-AAI
Register Keycloak as a service with LS-AAI:
- Obtain an LS-AAI account: Create an account if you do not have one.
- Register your organisation: Ensure your organisation is recognised as an IdP and register if not.
- Submit service registration: Submit a registration for your application as a service. Approval for this step may take some time.
Manage your app registration at https://services.aai.lifescience-ri.eu.
Configure LS-AAI in Keycloak
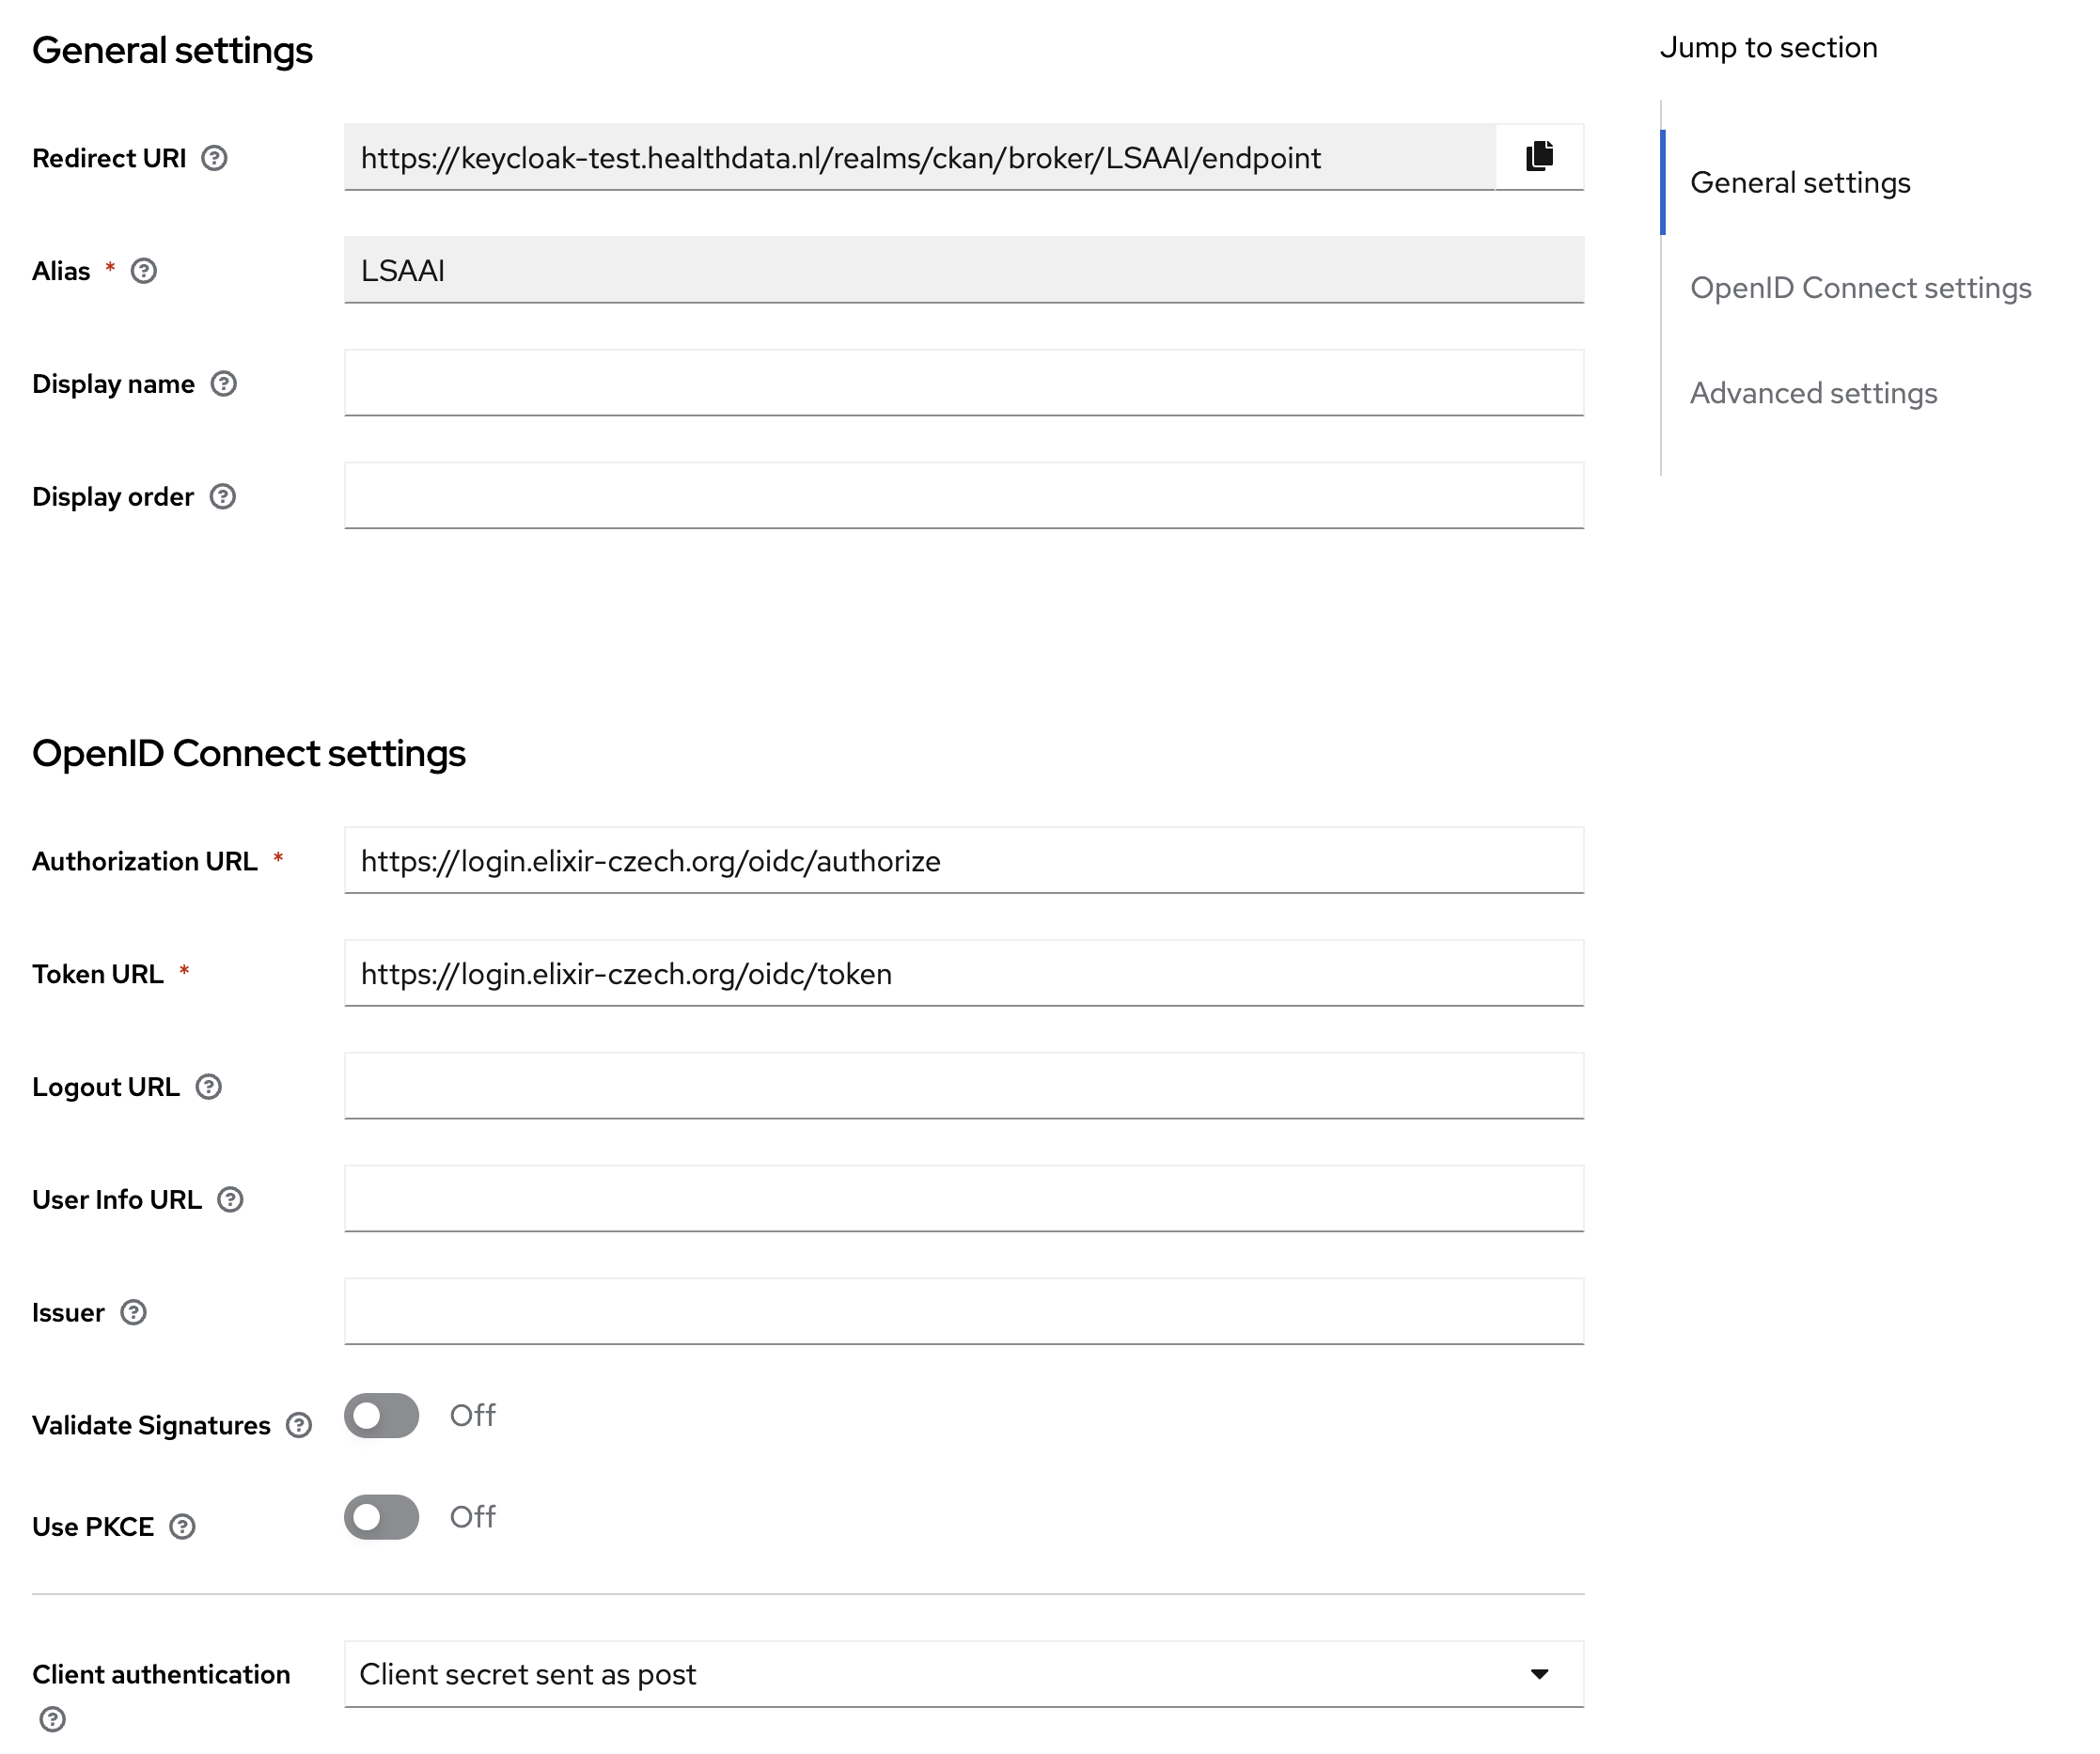
Set up LS-AAI as an identity provider in Keycloak with the following settings:
- Discovery endpoint: https://login.elixir-czech.org/oidc/.well-known/openid-configuration
- Scopes:
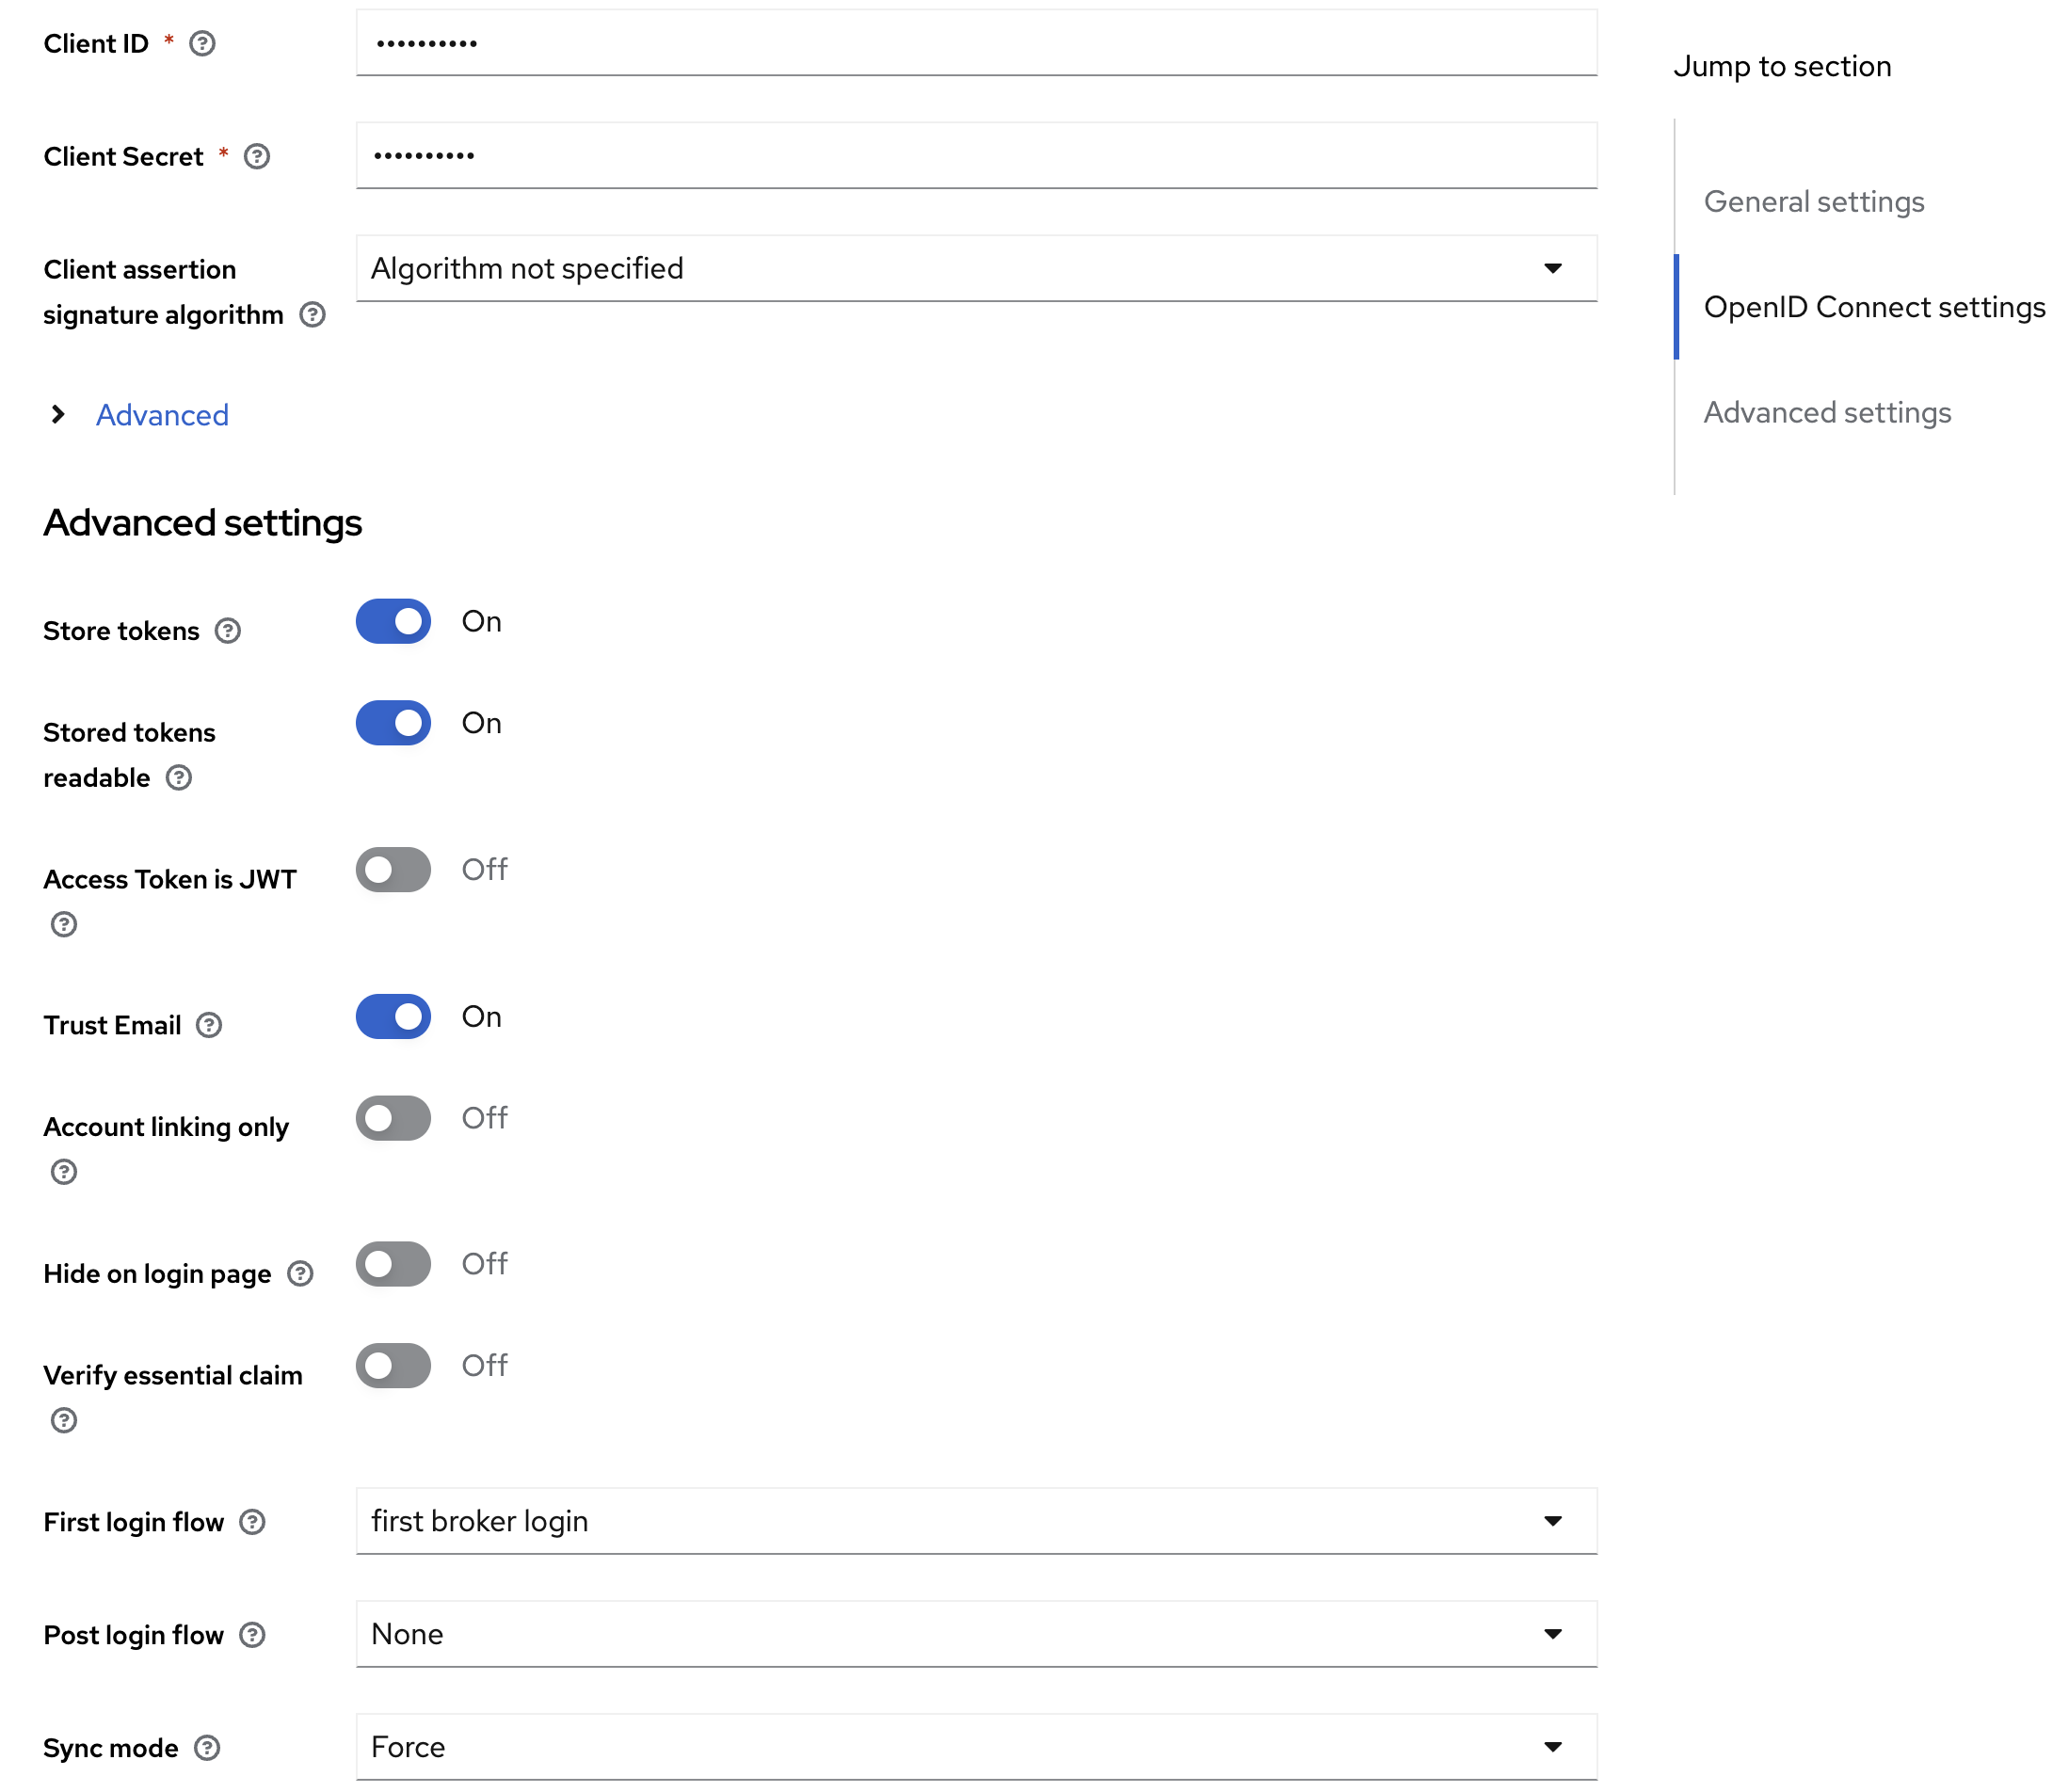
openid,profile,email,elixir_id - Sync mode: Import (not force)
- Store tokens: Enabled to allow User Portal components to get LS-AAI
access_tokenfor Beacon Network integration via OAuth2 - Stored tokens readable: Enabled
Here's an example of the LS-AAI configuration in Keycloak:
- You need additional mapper for
elixir_idto properly configure the attribute mapping in Keycloak. - When you first log in, the system will ask if you want to join the test environment. Select to agree and proceed.
Fetch LS-AAI access token from Keycloak
Access tokens from LS-AAI (or any IdP) can be fetched through Keycloak using one of the following methods.
Method 1: Direct API call
Configure Keycloak and request LS-AAI tokens through the API:
-
Go to Keycloak Admin: Navigate to Identity Providers, then LS-AAI Provider Details.
-
Enable token storage: Enable
Store TokensandStored tokens readable. -
Reinitialise users: Delete LS-AAI existing users to ensure users are initialised correctly in Keycloak.
-
Log in with LS-AAI user: Authenticate using an LS-AAI user account.
-
Call Keycloak endpoint: Make a GET request to fetch the token:
GET https://keycloak-test.healthdata.nl/realms/ckan/broker/LSAAI/token
Authorisation: {keycloak_access_token}
Method 2: Configure OAuth 2.0 in Postman
Set up OAuth 2.0 authorisation in Postman to obtain the LS-AAI token.
-
Open Postman application: Launch Postman on your desktop.
-
Select a request: Choose an existing request from your collections, or create a new one by selecting New, then Request.
-
Go to Authorisation tab: Navigate to the Authorisation tab within the selected request.
-
Set authorisation type: From the Type dropdown menu, select OAuth 2.0.
-
Add authorisation data to request headers: In the Add authorisation data to dropdown, select Request Headers.
-
Configure current token: For the Current Token section, choose Bearer as the token type.
-
Configure new token: Set up the token with the following parameters:
- Token Name: Enter a name for your token
- Grant Type: Select Authorisation Code from the dropdown menu
- Authorise Using Browser: Ensure this box is checked to use your default web browser for authorisation
- Auth URL: Replace
{keycloak_url}and{realm_name}with your Keycloak server and realm:{keycloak_url}/realms/{realm_name}/protocol/openid-connect/auth - Access Token URL: Fill in the Keycloak server and realm information:
{keycloak_url}/realms/{realm_name}/protocol/openid-connect/token - Client ID: Enter
ckanor the specific client ID you have been provided - Client Secret: Enter the client secret you obtained from Keycloak that corresponds to your client ID
- Scope: Enter
openid profile email elixir_id - Client Authentication: Select Send as Basic Auth header from the dropdown menu
-
Obtain access token: Select the Get New Access Token button to initiate the OAuth 2.0 authorisation flow.
After completing these steps, you will receive an access token that contains an elixir_id and can be used to authorise your requests within Postman.
After configuring LS-AAI in Keycloak:
- Manage user roles and permissions: Configure user access levels.
- Manage data and services: Set up CKAN and data sources.
- Monitor and maintain the system: Set up monitoring and logging.